Launcher
To start using the features inside the Uptimai software package, a project has to be created first. This first step can be done easily using the Uptimai Launcher program which can be found inside the main Uptimai software installation folder or using desktop or start-menu shortcuts created during installation.
When the working project is set with its path, all the tools of the software package become visible and can be used. They are accessible directly via buttons shown in the program window. Alternatively, each Uptimai software tool can be run independently from its installation folder.
How to use the interface#
The initial state of the application's window can be seen in Figure 1.
At the left part, there is a list for a quick selection of recent projects used.
Any recent project can be removed from the list by clicking on the X mark found in the upper right corner
of each item. On the right side, there are two main buttons. New project button allows the user
to select or create
a folder, which name becomes the name of the project. Already existing folders selected for a new
project have to be empty. The creation of a new project is finished when the program creates the
<*project_name*>.uptim file in the project folder. The Open button selects
a folder with an already existing project.
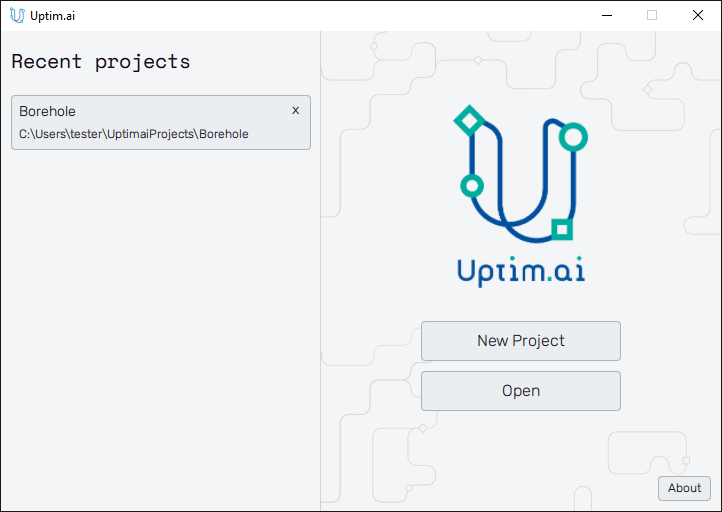
In the bottom right corner, there is an About menu with a list of features, a link to this document (Help), company information and contact (Company), and the version of the software used (Version).
After having selected or created a project, the application window switches to the state shown in Figure 2, where the window becomes rearranged. On the left, there is current project info including Project name and Path to project directory. Button Show files opens an explorer window showing the inside of the project folder. Again, there is an About button showing the program info menu. The Close project button takes the user back to the initial screen of the GUI.
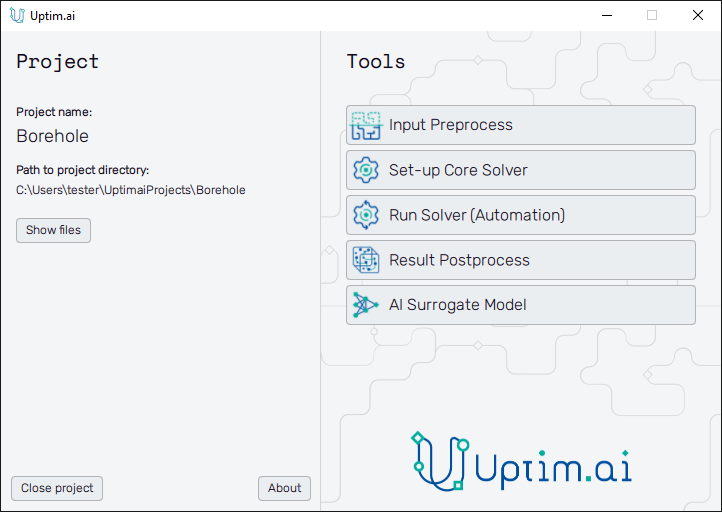
The Tools section on the right side of the window can bring the user to other Uptimai software package programs. Clicking any button in this section starts the corresponding tool and closes the Launcher temporarily. Available tools are:
- Input Preprocessor : Creates input distributions for the different methods (Uncertainty Quantification, Data Analyzer, Preliminary Analysis, Statistical optimization, and Design of Experiment). It also allows loading of already built distributions, plotting them, and exporting graphic outputs.
- Core Solver Setup : Sets all parameters of the Core Solver together with directions on where to store the final results.
- Run Solver (Automation) : Performs the coupling with the external code (expensive function) and manages the communication between it and the solver. Requires all files created in Input Preprocessor and Core Solver Setup modules and saves the results in the selected path.
- Result Postprocessor : The tool to analyze the result files of the different features. Computes the sensitivity analysis, creates plots of increment functions, their histograms and influencer plots, as well as data convergence history. All outputs can be stored for further use.
- AI Surrogate Model : For Uncertainty Quantification and Data Analyzer methods, allows the use of the created surrogate model, and gives the output value for a given set of input parameters.