Software installation
Here is the summary of steps one needs to do to obtain the Uptimai software and install it on the computer. To complete this tutorial you will need access to the Member area of the Uptimai website. In case you are new to Uptimai and do not have your account created yet, please, contact our sales team at sales@uptim.ai.
This tutorial will show you:
- How to obtain the software package
- Getting the license
- Setup of the installation
- How to install/uninstall the software
Part 1: Downloading the software
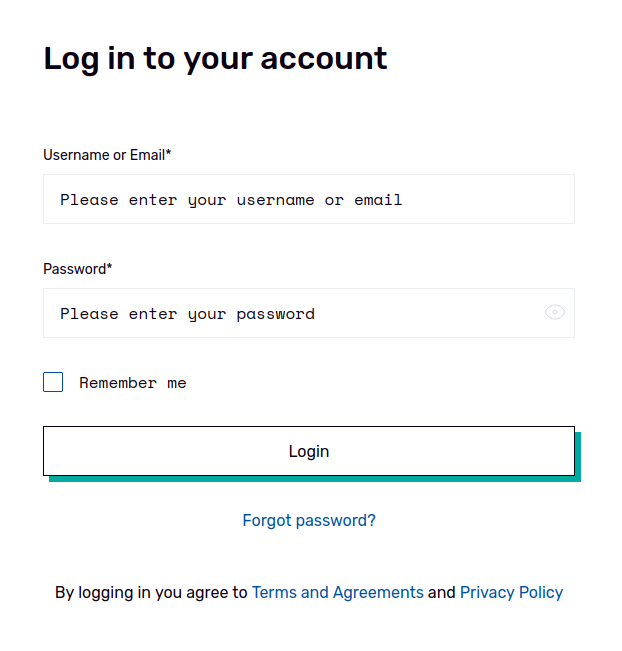
1.1: Log in to your account
Visit the Member area of the Uptimai website. Log in with your email or associated username. If you are logging in for the first time, ask for the password via the Forgot password? link. The new password will be sent automatically to your registered email address.
1.2: Download the installation package
In the Member area navigate to the Download -> Software section.
Find the version of the software you want to install. It is available as an *.exe file for
Windows or a *.zip archive for Linux. Download the desired file to the target folder of your
machine, and eventually unzip the archive.
Part 2: Starting the installation
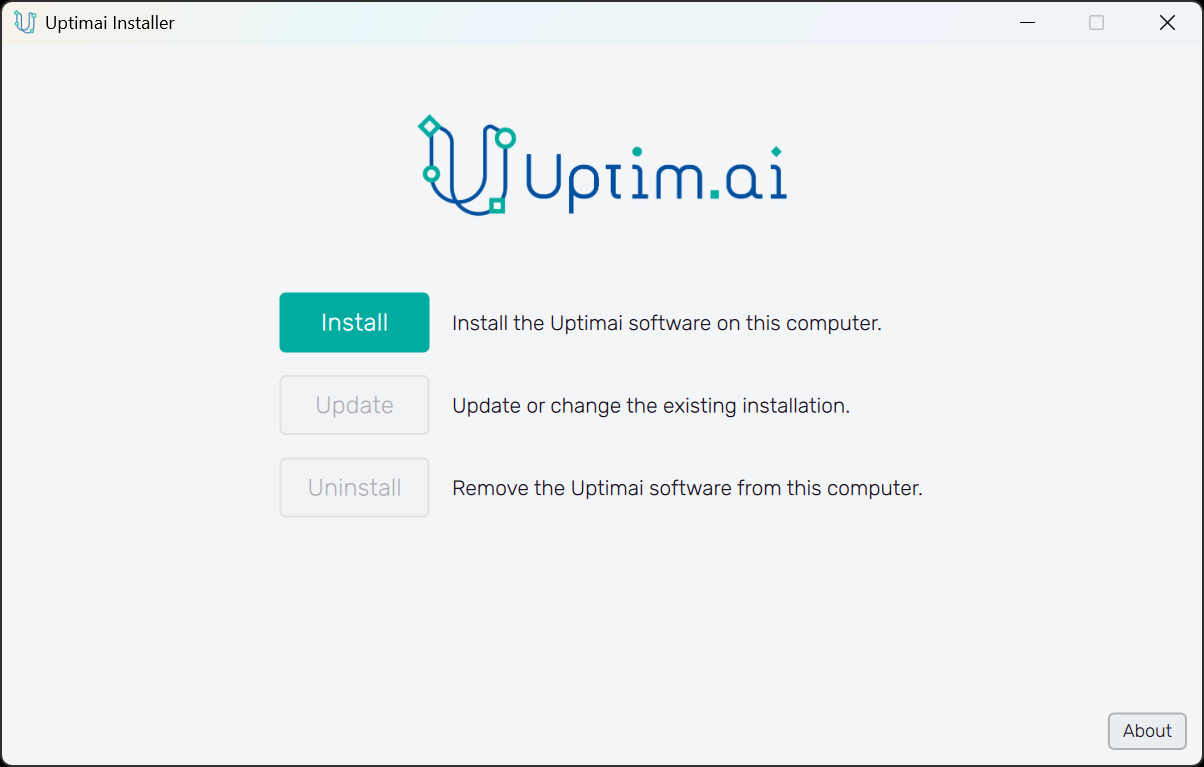
2.1: Run the Installer
Run the uptimai_installer binary. It is recommended to do so as an administrator to prevent
permission issues during the installation process. With no Uptimai installation on the computer
only the Install button is active on the screen. Update and Uninstall buttons remain inactive
until the software is installed.
Clicking the Install button will switch to the screen where the installation setup begins.
Part 3: Setup of the installation
3.1: Configure licenses
The Configure Licences button shows the section where the licensing method is selected. You can choose from the Node-locked licence and the Floating licence. Proceed according to the type of licence you've bought.
On the very top of the screen there is a field showing the Computer UID of you machine. To obtain the license you need to send your computer UID via the Member area → License request section of the Uptimai website or directly to your assigned Support person. Licence files will be sent to you shortly after.
The Node-locked licence requires you to enter the path of the UI licence file UptimAI_UI.lic and
Solver licence file UptimAI_Solver.lic. For the Floating licence, the IP address of the
Licensing server location has to be entered. The Port number is by default. If you
need to use a different port, please, contact your support together with your license request.
Running the license server requires the installation of the licensing software on the machine you will be using for the license management. Contact the Support for details.
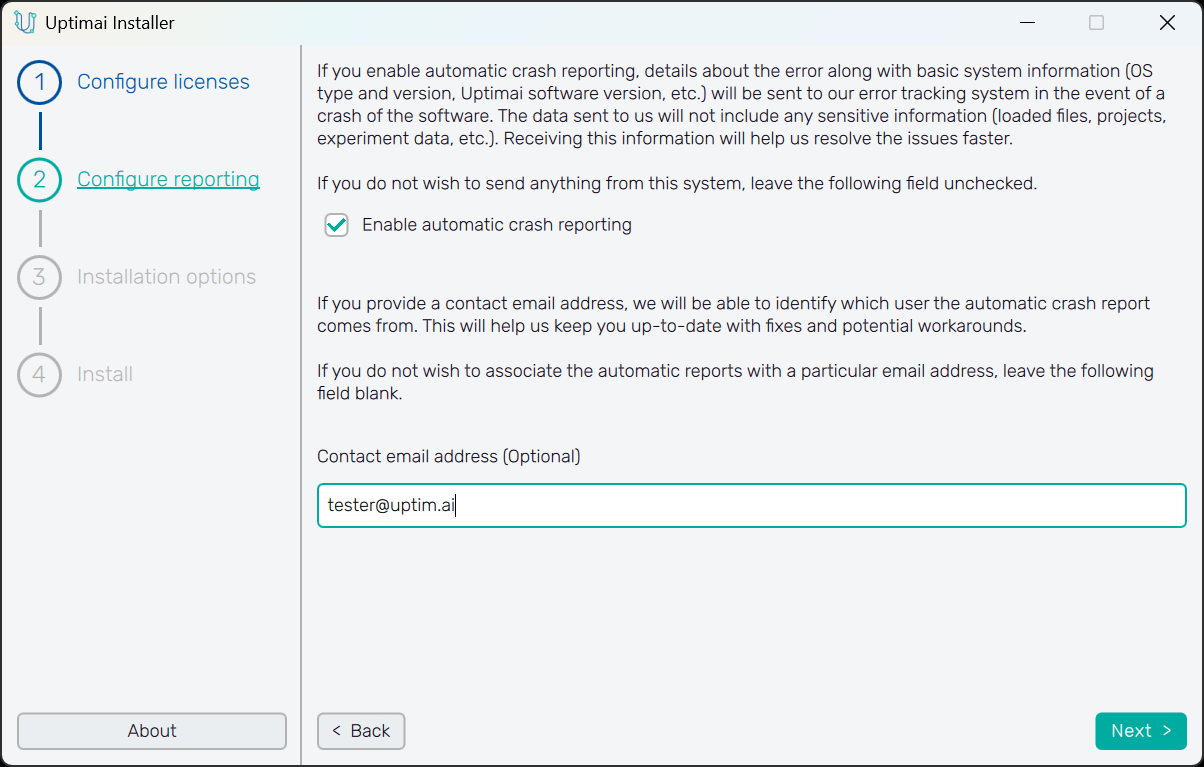
3.2: Configure reporting
The software can report issues and crashes of the program automatically to the support team via email. This usually speeds up the process of troubleshooting. When turned on, it can be sent anonymously or together with a Contact email address to keep you up-to-date with fixes and potential workarounds. Reporting is OPTIONAL!
3.3: Installation options
The most important option to be set is the Installation location. Click the folder icon in the entry field to open the file explorer. You can either create a new folder or selecting an existing one. However, if the selected folder is not empty, you will be informed that all the data in such location will be deleted during the installation.
You can also instruct the installer to Create shortcut on Desktop and to Create Start Menu shortcut.
The installation will be available for the current user only, unless the Install for all users switch is toggled on. This option is active only when the Installer is running with the administror's permissions.
You can choose how the environment variables should be set. There are three options:
- Set environment variables directly - sets the environment variables directly for the current user (or all users, depending on configuration).
- Use .env file - the environment variables are stored in the
.envfile inside the installation directory. The software loads the values from this file. - Do not setup environment - environment variable setting is skipped completely. It is expected that you will set the variables manually (not recommended, only for specific use-cases).
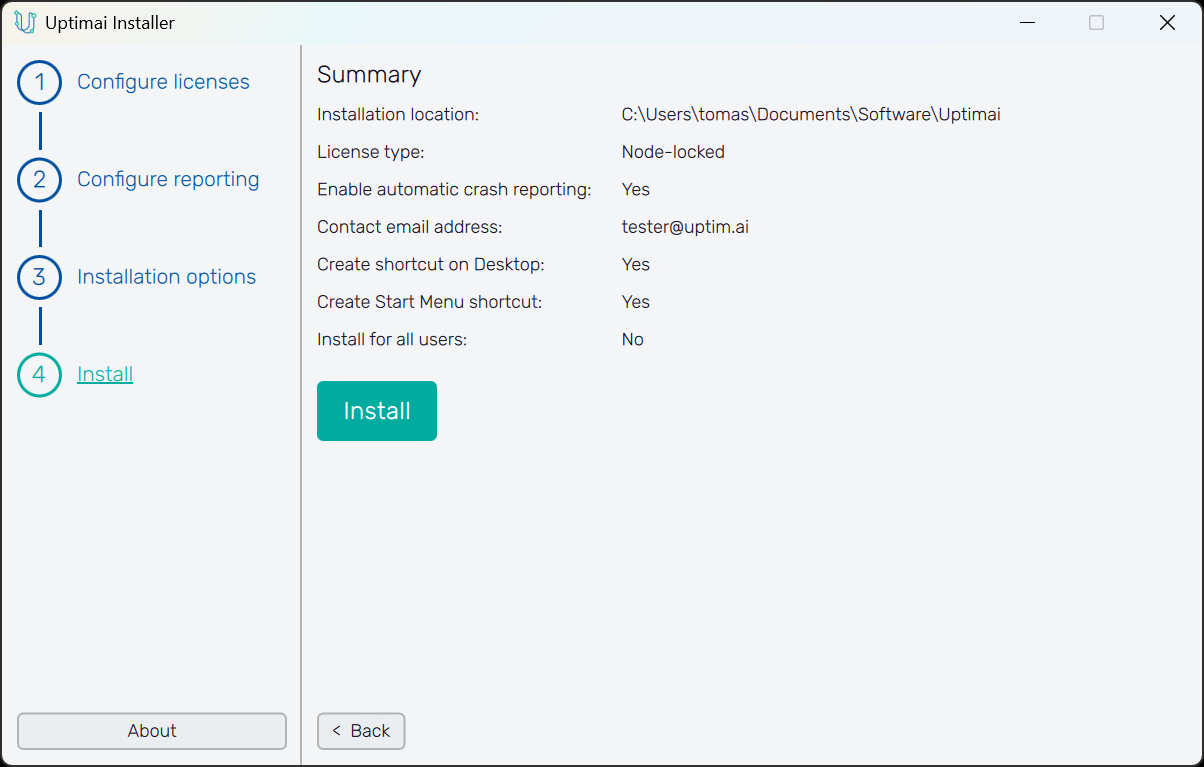
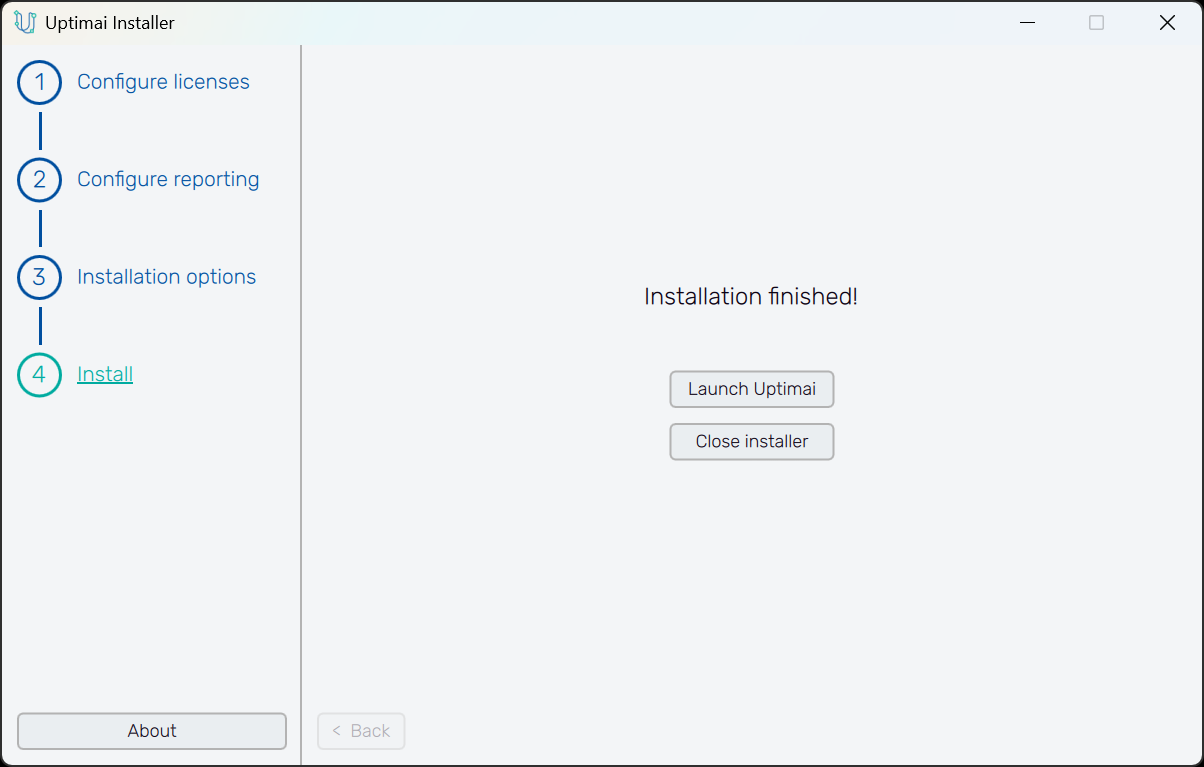
3.4: Install
The final step of the installation process is to review the summary of the installation settings and to confirm it with the Install button. In case some setup has to be changed, navigate to the corresponding installation step with the Back button bellow.
Once the installation is finished, you can either Launch Uptimai and start to work with the software directly or just Close installer.
Part 4: Software update/uninstallation
Once there is an installation of the Uptimai software found on the computer, Update and Uninstall buttons become active. Hovering over these buttons with the mouse cursor then shows the path to the current installation folder.
4.1: Update
The Update option brings you to the workflow already known from the installation. All entries and switches are set as it is for the current installation. You can change these and everything will be rewritten in the end.
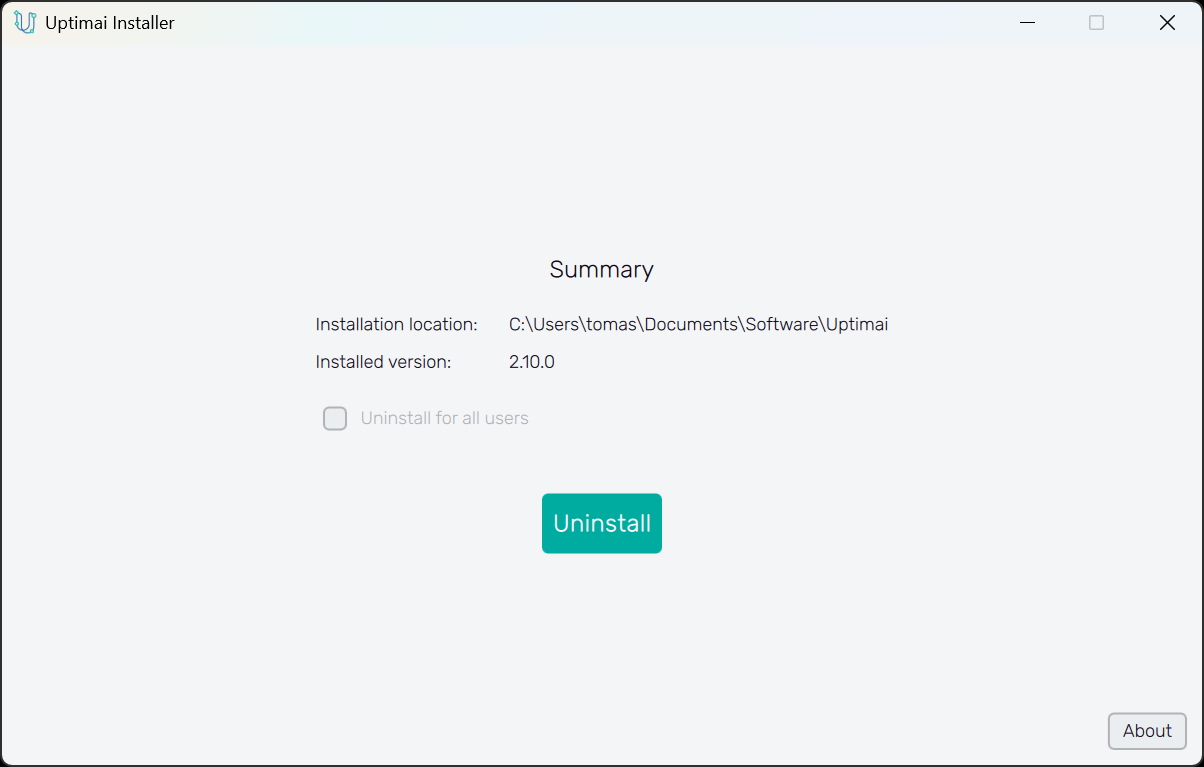
4.2: Uninstall
The uninstallation of the whole Uptimai software package can be done easily through the Uninstall screen by confirming the action with the Continue button. If the program was installed for all users, and you are running the installer with administrator's permissions, you can perform the uninstallation for all users as well.
Part 5 (Optional): Environment variables
The software utilizes the following environment variables:
UPTIMAI_PATH- absolute path to the installation directory (eg./opt/uptimai)UPTIMAI_RELEASE_VERSION- version number of the installed release (eg.2.12.0)UPTIMAI_ENV_METHOD-default,fileornoneUPTIMAI_ALLOW_SEND_REPORTS-0or1UPTIMAI_REPORT_USER_EMAIL- email address or empty stringUPTIMAI_INSTALLED_AS_ADMIN-0or1
In case the Set environment variables directly option is selected during installation, these variables are written by the installer to the environment of the user.
In case the Use .env file options is selected during installation, the variables are stored in the .env file in the installation directory. The installer also attempts to set
the UPTIMAI_ENV variable, which is optional and may contain the full path to the .env file (eg. /opt/uptimai/.env). If this variable is not set, the software will look for the file in the
same directory where the launcher executable (uptimai or uptimai.exe) is located.
The user can utilize this variable to override the path to the .env file
(in case they wish to use a different .env file, or want to store the file in a different location than the installation directory.)
In case the Do not setup environment option is selected during installation, no environment variables are set. It is up to the user to set the variables. The UPTIMAI_PATH and UPTIMAI_RELEASE_VERSION
variables are required, the others are optional and default values will be considered, if the variables are not set.