Run Solver (Automation)
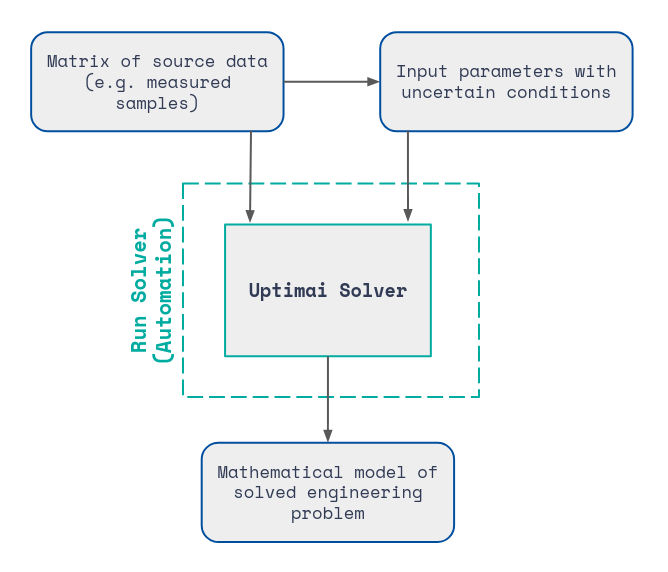
Run Solver (Automation) is a separate tool that interfaces the source data with the Uptimai Solver, which uses the data to build mathematical models. The Automation is also able to run an external software, log and store console outputs of this software and the Uptimai Solver itself. It can also read and modify files and organize them within the folder structure.
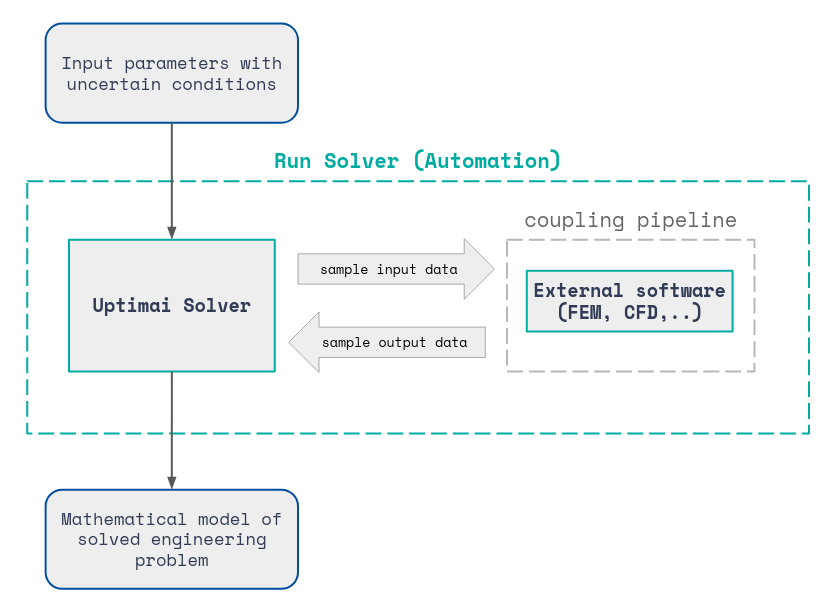
The GUI of the program minimizes the need for scripting and interaction with the command line or the console. The appearance of the GUI and its controls might differ according to the method used by the Uptimai Solver. It is because the method defines the need for a coupling pipeline that collects data from external resources, such as third-party software or databases.
To start the GUI, it is necessary to complete the previous steps of the Uptimai project workflow - define the set of inputs in the Preprocessor and prepare at least one setup in the Core Solver Setup.
Running Solver with methods using existing data
When processing an existing set of results, there is no need to create a coupling pipeline. The source of data is defined along with creating the domain in the Preprocessor, and the dataset is loaded directly by the Uptimai Solver. The GUI of the Automation only runs (and eventually stops) the solver and collects its console output, informing users about the progress of the model-building process. This workflow is valid for the following methods:
- Data Analysis : Building the mathematical model from already existing data, e.g. results of performed experiments.
- Data Analysis (multiple datasets) : Generating multiple mathematical models from already existing data at the same time. Mainly, it is running several instances of the Data Analysis method, with the addition of a comparison of the models at the end and allowing the anomaly analysis.
- Statistical Optimization (function approach: Data model) : When using an already computed surrogate model to evaluate requested samples, there is no need to create a coupling pipeline.
- Direct Optimization (function approach: Data model) : When using an already computed surrogate model to evaluate requested samples, there is no need to create a coupling pipeline.

Running Solver with methods that require coupling
A definition of a coupling pipeline is required to integrate the Uptimai Solver with another software. Within the pipeline, the Automation is able to pass (not only) input parameter values to any executable. The Automation controls processes of the pipeline, and also allows for debugging the run and the data exchange between programs and files handled in the pipeline. Special attention is given to Python script execution, where the user can select the Python interpreter best suited to the project or even to create their own virtual environment. The coupling pipeline is required in the following Uptimai Solver methods:
- Preliminary Analysis : Analysis showing the sensitivity of the variance of results to input variables. A simplified process that does not require building the full surrogate model, significantly reducing the number of samples is required.
- Uncertainty Quantification : Building the mathematical model describing how changes in input variables propagate and affect the observed outputs. The data is obtained from the third-party computational software coupled with the Uptimai Solver.
- Statistical Optimization (function approach: Adaptive AI) : Finding the optimum zone of the domain, taking into account the uncertainties of the variables. It builds several models at different scales of the problem.
- Direct Optimization (function approach: Function call) : Exploring the design space directly, the coupling pipeline is used to retrieve the function values of the requested samples.

How to use the interface
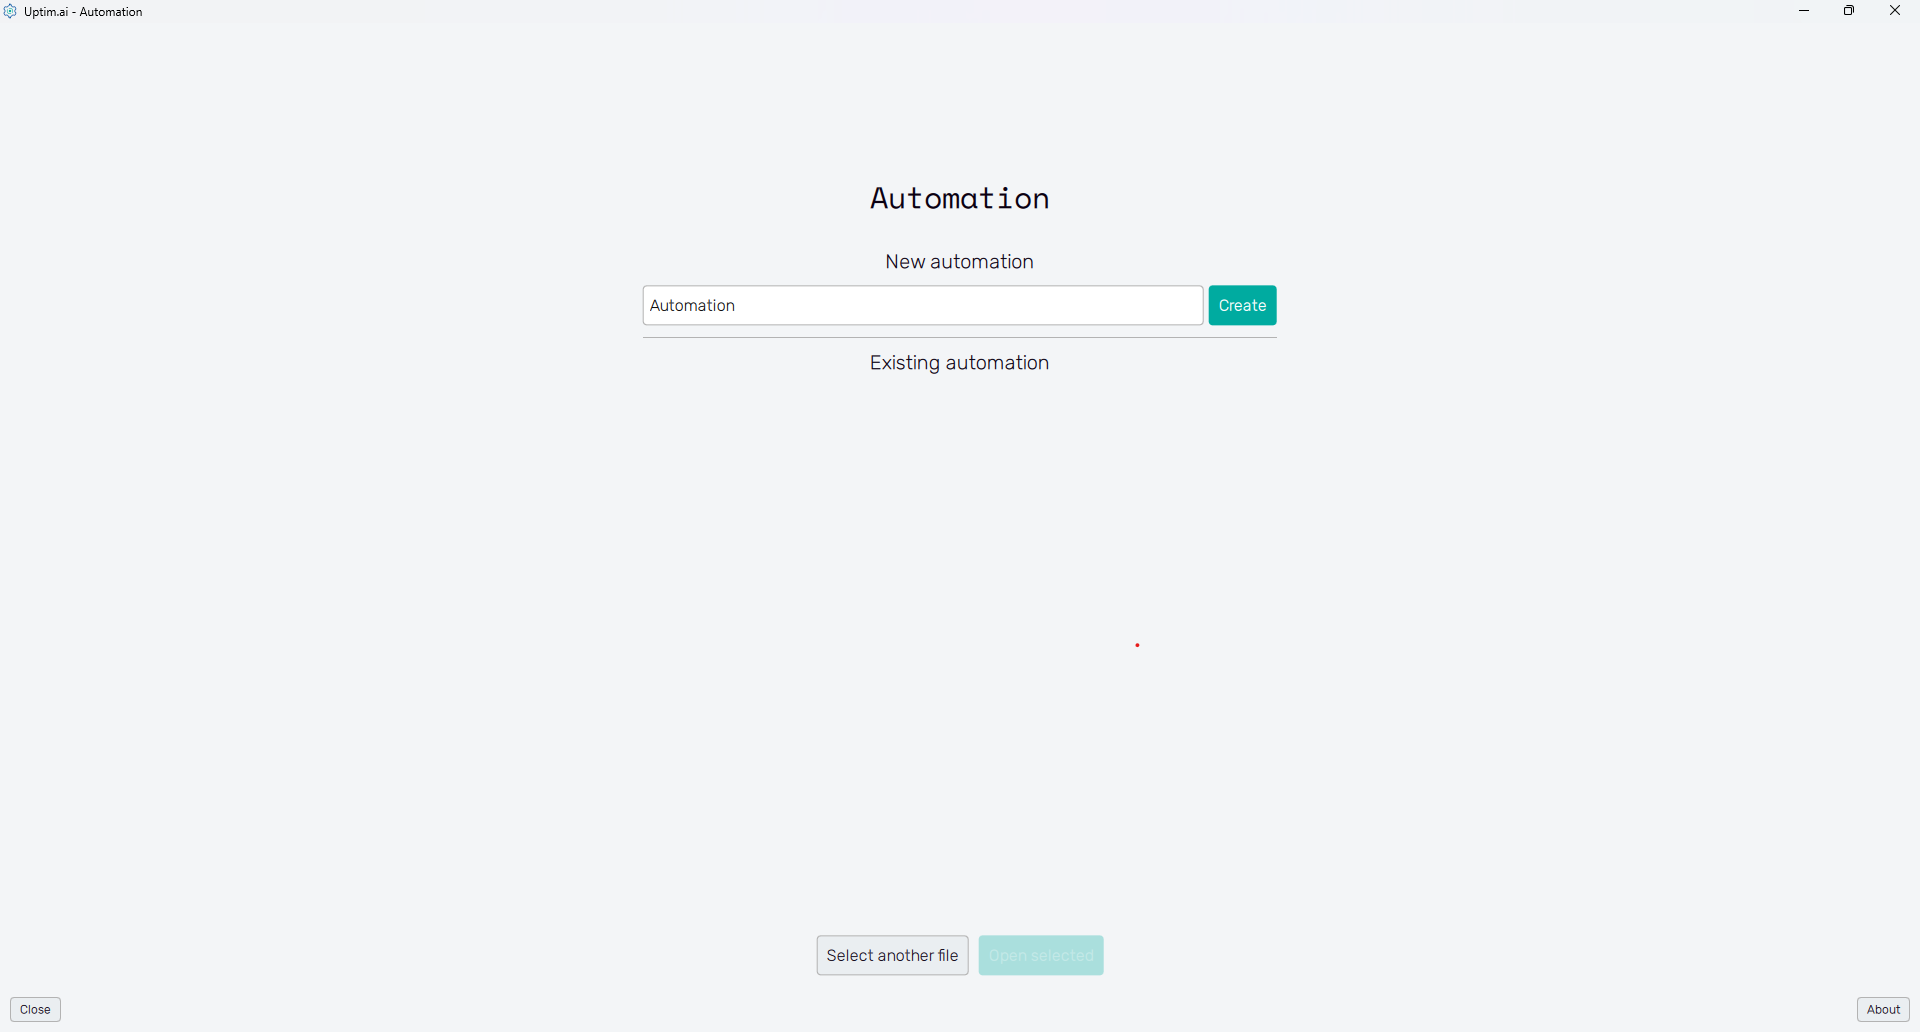
In Figure 3, it can be seen the initial state of the application's window which is split into two main sections. Here, the user can either create a new set of input files or work with already existing ones.
The About button on the bottom right shows the menu dedicated to accessing the link to this document (Help), contacting the Uptimai company to get support (Company), and showing the information about the currently installed version of the program (Version). The Close button on the bottom left ends the program and closes the GUI.

New setup
To create a new automation session, the user needs to enter a unique name into the entry field in the New automation section of the screen and confirm with the Create button. The new session will be opened for setup and later added to the list of existing automation sessions.
Existing setup
In the Existing automation section of the screen, there is a list of automation sessions known to the software. Each item is presented by its name, the method that is about to be solved, and the name of the setup file. Loading an existing session is possible via double-clicking an item from the list or by clicking the item and confirming with the Open selected button below. Also, it is possible to use the button Select another file to open the file explorer to locate another automation session file than listed.
With an active automation started, the GUI will proceed to the latest available stage of the Automation workflow. For new sessions, it is always the General setup.