Input preparation
After the input is selected for editing through the Input Preprocessor
home screen, the user can proceed with the configuration of input variables of the project and
their probability distributions. When the process is finished, the program updates the
<project>.uptim file and also saves all the input files in progress (see
New input for their description).
How to use the interface
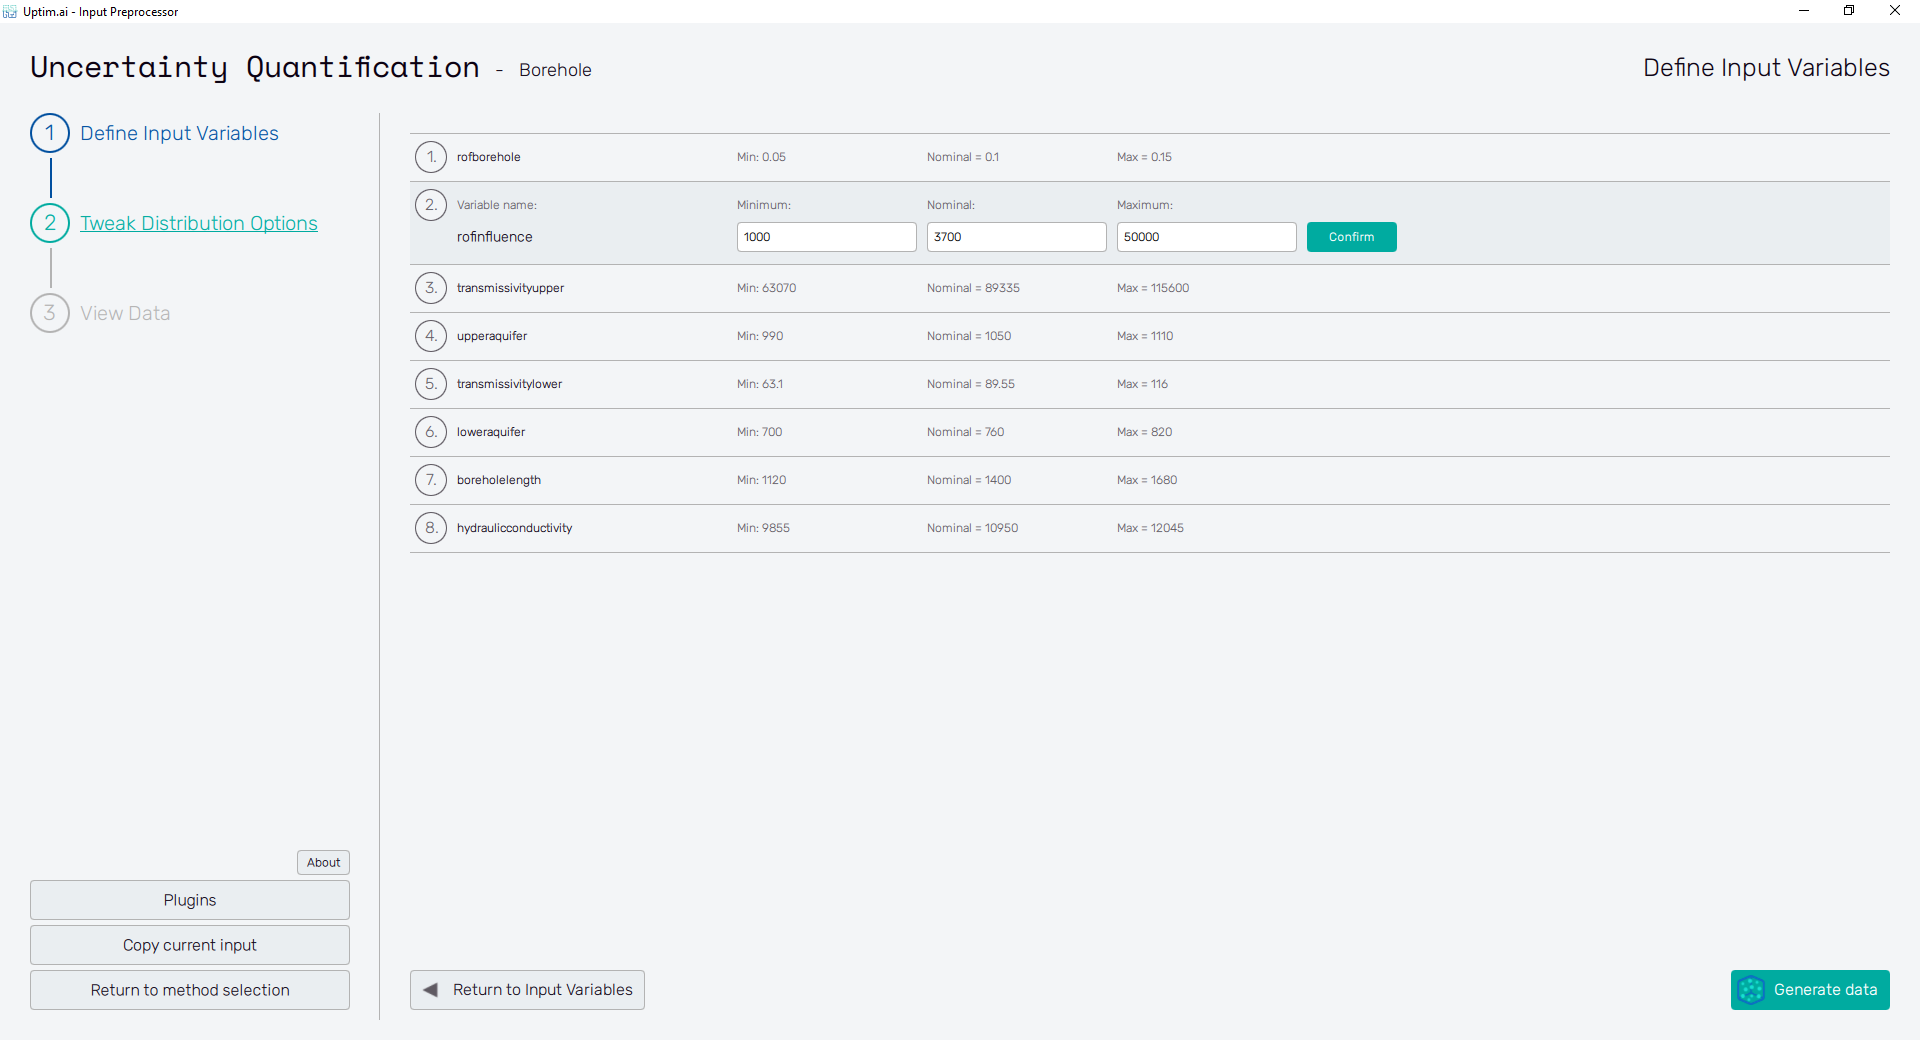
Figure 1 shows an example of the screen layout during the processing of the inputs. The very top section of the window informs the user about the method the currently processed input is intended for, the actual name of the input and on the right the confirmation of the current progress.
The left section of the screen depicts the Fishbone navigation bar with an overview of all the necessary steps to proceed with the current method. Three buttons are located underneath:
- About : Shows the menu dedicated to accessing the link to this document (Help), contacting Uptimai company to get support (Company), and showing the information about the currently installed version of the program (Version).
- Copy current input : Opens the Copy current input dialogue to create a duplicate of the input and its files.
- Return to the method selection : Switch to the Home screen of the program to start the process from the beginning.
The user can work with the properties of the input and its variables on the right section of the window. Its appearance changes according to the progress of the input preparation. At the bottom there are (usually) two navigation buttons that can be used either to return to the previous step of the input preparation or to confirm the current progress, write data into files, and continue with the process to the next step.
Fishbone navigation bar
The 'fishbone' shows all stages of the input preparation for the selected method. At the beginning of the process, all items but the first one are disabled since the user has to follow the prescribed order. Successful completion of the first step accesses the following one. For already prepared inputs correctly loaded from files all the items are available. The current position in the process is represented by the highlighted item in the fishbone. The following items are part of the input preparation workflow:
- Select Initial Data
: Step specific for Data Analyzer and Data Analysis (multiple datasets)
method. The user needs to select
*.csvfiles with matrices defining samples (coordinates of inputs in the domain) and their corresponding results. - Define Input Variables : Definition of probability distribution types and their parameters for each input variable. input distributions, settings of the Monte Carlo sampling for model propagation and visualizations. Available for all methods.
- Tweak Distribution Options : Adjustment of input domain boundaries and definition of the nominal sample. Available for all methods.
- Define Convergence : Step specific for Statistical Optimization method. Definition of the Target Percentile for every active variable.
- Define Constraints : Step specific for Direct Optimization method. Definition of constraints (penalties) applied to input variables or outputs during the optimization process.
- View Data : Available for Data Analysis, Uncertainty Quantification, Statistical Optimization, Data Analysis (multiple datasets), and Preliminary Analysis method. Shows generated distributions for each input.
- Setup Experiment Design : Definition of the method used for sampling and its optional parameters. Specific for Design of Experiment method.
The navigation through the workflow can be easily done just by clicking on the fishbone items (applicable on active items only, depending on the actual progress of the input preparation).
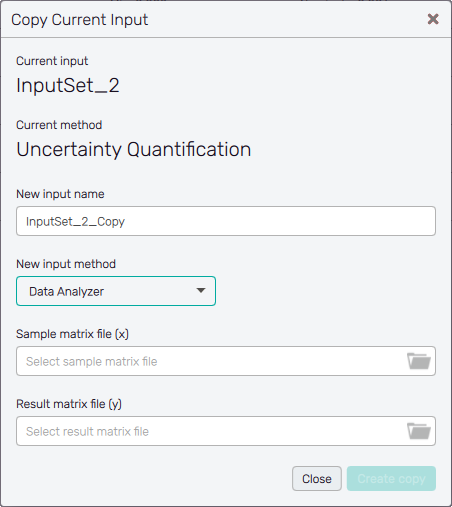
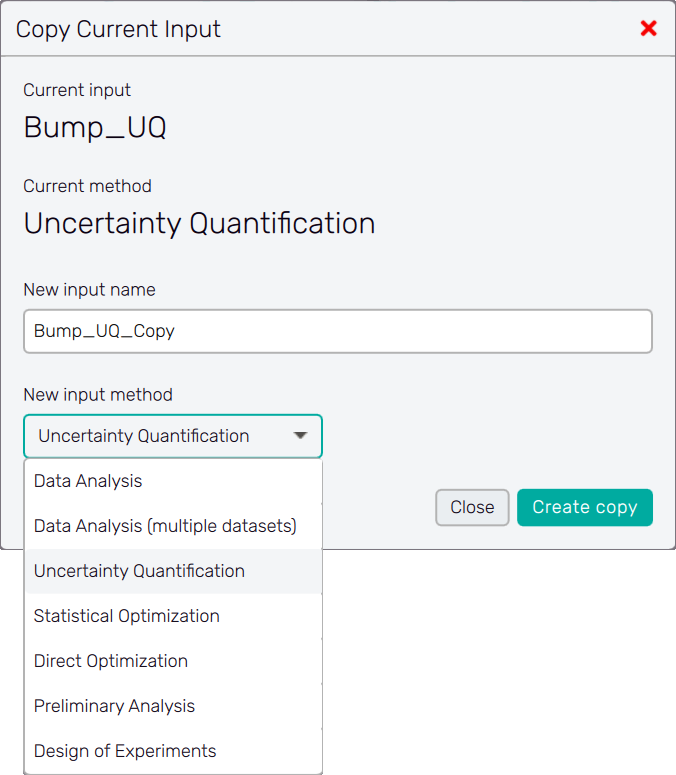
Copy current input
A copy can be created from the current input using the dialogue in Figure 2. The user can change the method for the copy of the input using the New input method and also set the input name for the copy. That functionality is useful when several methods want to be applied in the same project
If the input for the Data Analyzer or Data Analyzer (multiple datasets)is created, the user also selects the X and Y matrices in case these were not defined in the source set of input files.