Selection of Files
Compare Outputs is a feature currently available for Uncertainty Quantification, Data Analysis and Statistical Optimization methods. Its purpose is to analyze two outputs of the same or similar problem together in order to get an easier interpretation of results and discover new insights.
In the simplest case, one can compare two models with the same inputs (designed in the Input Preprocessor). This is eg. when the function of interest has two outputs, so two or more models are created from the same configuration and from the same solver run.
Other option is to compare two models, which are describing the same physical problem, but maybe with slightly different domain boundaries, different variable input distributions, or are created using different core solver method (eg. Data Analysis and Uncertainty Quantification). In such case, it is required that both model have the same number of variables, share the same variable names and order and that the input domains have a non-empty intersection.
If the selected result files are not created from matching input definitions, there will be a warning dialog displayed, informing user about this and describing the possible consequences, which are mainly:
- if the variables do not have the same physical meaning, the comparison may not make sense,
- if the nominal input values differ significantly, the Histogram and Influencer views will be affected (when variables/increments are deselected, each model will receive different samples, because of the different nominal input values being used instead of the disabled variables),
- instead of using a single Data file defined in the Preprocessor (the Monte-Carlo samples), a new common set of samples wll be created by merging the two existing Data files and picking only the unique samples, which are within the intersection of both domains.
- as a result of this, all model results precomputed in the Core Solver will need to be recomputed for the new set of Monte-Carlo samples, which can be time-intensive (this may take several minutes).
How to use the interface
For accessing the Compare Outputs feature, it needs to be selected directly from one
output model (similarly to all the other features, from a .upst file). Once it is
selected, a pop-up window to select the second output will appear as can be seen in
Figure 1.
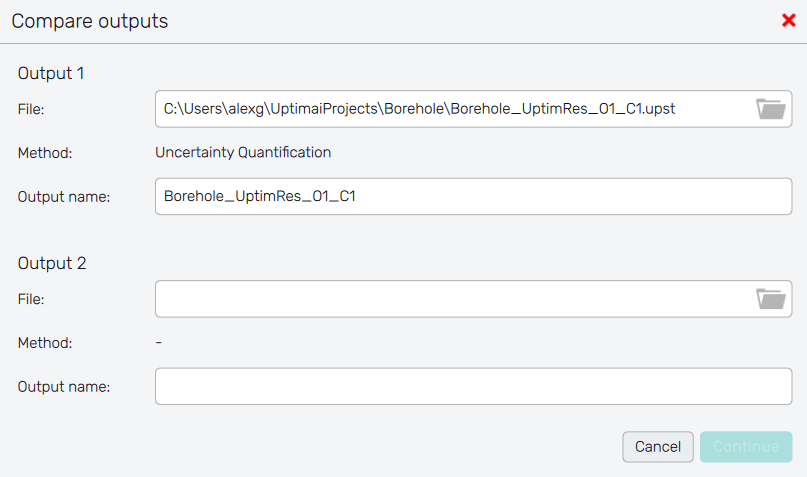
The following information is displayed for each output:
- File
: Allows to select a
.upstfile, which has all the information from the model relevant to the specific output. - Method
: Shows which method has been used to generate the selected
.upstfile. This information is shown automatically when the file is loaded. - Output name : Allows to choose the naming given to the outputs for easier interpretation later. By default, it has the same name as the file selected.
By default, all the information required for Output 1, is already pre-established as is
taken from the original .upst file. Both Output name entries can be changed by the user. These
names are used to construct labels of plots. If the comparison of outputs can be done (result files
are compatible), the user can see the current naming and method of compared files at the top section
of the screen right next to the list of available features. Naming of outputs can be changed via the
dialog under the ⚙ icon.